

CapamaBlog
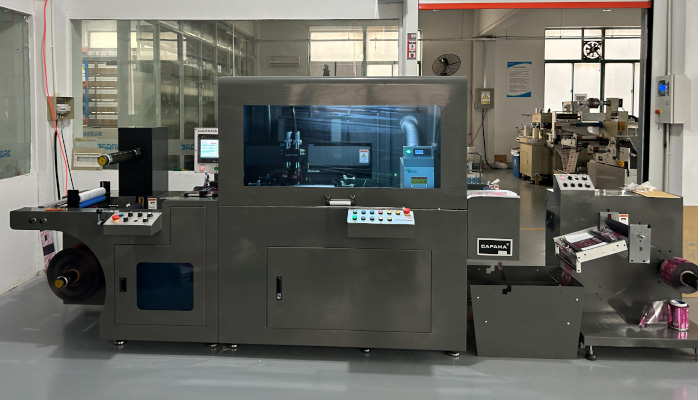
Roll-to-roll automatic screen printing machines are widely used in labels, packaging, and electronics printing due to their thick ink layer, saturated colors, and broad material adaptability. CAPAMA's CPM 520SX/SXT and RR-320S/520S/320ST series have served 200+ customers globally.
This article compiles the 20 most frequently asked questions during selection and usage, covering the complete knowledge chain from basic concepts to advanced processes. Whether you're a beginner or experienced practitioner, you'll find practical value here.
---
## Part 1: Basic Knowledge (Q1-Q5)
### Q1: What's the difference between screen printing and letterpress printing? How to choose?
**Answer**: Core differences between the two processes:
| Item | Screen Printing | Rotary Letterpress |
|------|-----------------|-------------------|
| **Principle** | Ink passes through mesh openings to substrate | Raised plate areas contact substrate |
| **Ink thickness** | 10-50μm (thick and full) | 2-8μm (fine and uniform) |
| **Speed** | 8-15 meters/minute | 80-150 meters/minute |
| **Colors** | 1-4 colors (mainly spot colors) | 4-8 colors (CMYK + spot) |
| **Materials** | Paper, film, metal, glass, etc. | Mainly paper and film |
| **Applications** | Thick ink labels, braille, spot UV | Multi-color labels, barcodes, text |
**Selection guide**:
- **Choose screen printing**: Need thick ink effects, special inks (foaming, fragrance, temperature-sensitive), large solid areas
- **Choose letterpress**: Multi-color registration, fine text/lines, high-speed mass production
- **Combined solution**: Screen + letterpress inline production (CAPAMA supports customization)
### Q2: What are the main differences between CPM 520SX and RR-320S?
**Answer**: Positioning and specifications comparison:
**CPM 520SX **(Premium Flagship)
- Max printing width: 520mm
- Printing speed: 8-15 meters/minute
- Print cycles: Approximately 7,000 times/hour
- Drive system: Independent servo motor drive
- Registration accuracy: ±0.1mm
- Configuration: Full-auto threading, EPC correction, touchscreen control
- Applications: Wide-format labels, premium packaging, long runs
**RR-320S **(Economy Practical)
- Max printing width: 320mm
- Printing speed: 6-12 meters/minute
- Print cycles: Approximately 5,000 times/hour
- Drive system: Mechanical transmission + VFD speed control
- Registration accuracy: ±0.15mm
- Configuration: Semi-automatic operation, manual correction
- Applications: Small-medium width labels, short runs, budget-conscious customers
**Selection tip**: Annual output >5 million meters or width requirement >350mm, choose CPM 520SX; otherwise RR-320S offers better cost-performance.
### Q3: How to select screen mesh count?
**Answer**: Mesh count determines ink passage volume and printing precision:
| Mesh Count (mesh/inch) | Thread Diameter (μm) | Open Area | Applications |
|----------------------|--------------------|-----------|--------------|
| 80-100 mesh | 50-60 | High | Coarse particle inks, foaming, thick ink |
| 120-150 mesh | 40-50 | Medium | Standard inks, large solid areas |
| 180-200 mesh | 35-40 | Medium-Low | Fine patterns, four-color halftones |
| 250-300 mesh | 28-32 | Low | High-precision text, fine lines |
**Selection principles**:
- Thicker ink layer → Lower mesh count
- Finer pattern → Higher mesh count
- Coarser ink particles → Lower mesh count
**Rule of thumb**: Mesh count ≥ 4 × highest line screen (for four-color printing)
### Q4: What types of ink can be used for screen printing?
**Answer**: Screen printing has excellent ink adaptability:
**By drying method**:
- **Solvent-based ink**: Versatile, requires oven drying
- **UV ink**: Instant curing, eco-friendly, no VOCs
- **Water-based ink**: Eco-friendly, suitable for food packaging
- **Two-component ink**: Strong adhesion, weather-resistant
**By special effects**:
- **Foaming ink**: Expands when heated, creates 3D effect
- **Fragrance ink**: Releases scent when rubbed
- **Temperature-sensitive ink**: Changes color with temperature
- **Photochromic ink**: Shows different colors at different light angles
- **Conductive ink**: For printed circuits, RFID antennas
- **Braille ink**: High viscosity, forms raised dots
**CAPAMA compatibility**: All models can accommodate above ink types with adjusted squeegee pressure and drying temperature.
### Q5: How many operators does one screen printing machine need?
**Answer**: Staffing depends on automation level:
**RR-320S **(Semi-automatic)
- Standard: 2 persons (1 operator + 1 loading/unloading)
- High-output mode: 3 persons (add 1 QC inspector)
**CPM 520SX **(Fully automatic)
- Single-operator mode: 1 person (skilled technician can work independently)
- Standard: 2 persons (1 operator + 1 QC)
- Inline production: 2-3 persons (including post-processing)
**Tips to reduce labor**:
- Install automatic splicing device to reduce roll change downtime
- Use large-capacity ink containers to reduce refilling frequency
- Implement standardized operations, one person can manage multiple machines
---
## Part 2: Process Adjustment (Q6-Q12)
### Q6: What pretreatment does a new screen need before mounting?
**Answer**: New screen pretreatment procedure (critical!):
**Step 1: Degreasing **(5 minutes)
- Use specialized screen cleaner or alcohol
- Wipe both sides to remove residual emulsion and grease
- Rinse with water and blow dry with compressed air
**Step 2: Emulsion coating **(if making plates yourself)
- Apply 2-3 coats evenly
- Dry 10 minutes each coat (40°C)
- Store in dark place
**Step 3: Tension testing**
- New screen tension should be ≥20N/cm
- Four-corner tension deviation ≤10%
- Insufficient tension causes registration issues
**Step 4: Test print**
- Print 5-10 meters at low speed first
- Check for clogging, ink leakage, pinholes
- Confirm before formal production
### Q7: How to handle screen clogging during printing?
**Answer**: Common causes and solutions for clogging:
| Cause | Symptoms | Solution |
|-------|----------|----------|
| High ink viscosity | Poor ink flow, lighter color | Add thinner, reduce viscosity 5-10% |
| Ink dries too fast | Mesh holes blocked by dried ink | Add retarder, reduce oven temperature |
| Incomplete screen cleaning | Partial clogging, incomplete pattern | Stop and clean screen, use high-pressure water gun |
| Excessive workshop dust | Random clogging points | Improve environment, install air purification |
| Excessive squeegee pressure | Screen deformation, accelerated clogging | Reduce pressure to 0.3-0.5MPa |
**Emergency procedure**:
1. Stop immediately to avoid material waste
2. Cover screen with wet cloth to prevent ink drying
3. Gently brush clogged areas with soft brush
4. For severe clogging, remove screen for deep cleaning
5. Re-mount and test print to confirm
### Q8: How to adjust squeegee pressure and angle?
**Answer**: Squeegee parameters directly affect print quality:
**Squeegee pressure**:
- **Recommended range**: 0.3-0.6MPa
- **Too low**: Insufficient ink transfer, light color
- **Too high**: Screen deformation, reduced life, pattern distortion
- **Adjustment**: Start from low pressure, gradually increase until color is uniform
**Squeegee angle**:
- **Recommended angle**: 60°-75° (relative to screen)
- **Too small **(<60°) Incomplete ink scraping, trailing
- **Too large **(>75°) Less ink transfer, thin ink layer
- **Technique**: Larger angle for fine patterns, smaller angle for thick ink
**Squeegee hardness selection**:
- 60-70 Shore A: Soft, suitable for curved and uneven surfaces
- 75-85 Shore A: Medium, general purpose
- 90-95 Shore A: Hard, suitable for fine patterns and flat surfaces
### Q9: What causes misregistration? How to calibrate?
**Answer**: Systematic troubleshooting for registration issues:
**Mechanical factors**:
- Uneven screen tension → Restretch or replace screen
- Worn transmission gears → Check backlash, replace worn parts
- Rail straightness deviation → Calibrate rails, adjust level
**Material factors**:
- Material expansion/contraction → Control workshop temperature/humidity (23±2°C)
- Unwind tension fluctuation → Adjust magnetic powder clutch, add floating roller
- Material wandering → Calibrate EPC system
**Operational factors**:
- Improper screen installation → Reposition, use dial indicator
- Inconsistent printing pressure → Standardize pressure parameters across stations
- Excessive speed variation → Maintain stable production speed
**Calibration steps**:
1. Print crosshair registration marks
2. Use magnifier or CCD to detect deviation
3. Fine-tune screen circumferential and lateral adjustment screws
4. Repeat for each color station
5. Print 50 meters continuously to verify stability
### Q10: How to solve uneven ink layer thickness?
**Answer**: Common causes of uneven ink layer:
**Lateral unevenness **(left-right difference)
- Uneven squeegee pressure on both ends → Adjust squeegee balance screws
- Screen tension left-right deviation → Replace or restretch screen
- Substrate surface irregularities → Check material quality, adjust impression roller
**Longitudinal unevenness **(front-back difference)
- Ink viscosity changes over time → Add stabilizer, stir regularly
- Squeegee wear → Replace with new squeegee
- Unstable ink supply system → Check pump and pipelines for blockages
**Measurement methods**:
- Use wet film thickness gauge (measure immediately after printing)
- Use dry film thickness gauge (measure after drying)
- Target: Whole roll thickness deviation ≤±10%
### Q11: What causes poor UV ink curing?
**Answer**: UV curing troubleshooting checklist:
**UV lamp factors**:
- Lamp aging (over 1000 hours usage) → Replace lamp
- Insufficient lamp power → Increase power or add more lamps
- Dirty lamp surface → Clean with alcohol
**Process parameters**:
- Printing speed too fast → Reduce speed 10-20%
- Ink layer too thick → Reduce squeegee pressure or increase mesh count
- Insufficient UV energy → Measure with UV radiometer, target ≥200mJ/cm²
**Ink issues**:
- Expired or improperly stored ink → Replace with fresh ink
- Insufficient photoinitiator content → Contact supplier for formula adjustment
- Excessive pigment content (dark colors) → Extend exposure time or reduce speed
**Environmental factors**:
- Oxygen inhibition (tacky surface) → Add nitrogen protection or increase power
- Low temperature → Raise workshop temperature to 20-25°C
### Q12: How to achieve accurate spot color matching?
**Answer**: Professional spot color mixing procedure:
**Tools needed**:
- Electronic scale (0.1g precision)
- Color matching software or swatch book (e.g., Pantone)
- Proofing machine or manual drawdown tools
- Standard light booth (D50 or D65)
**Mixing steps**:
1. **Define target color**: Customer provides Pantone number or physical sample
2. **Select base inks**: Choose standard base inks close to target hue
3. **Calculate formula**: Estimate ratio using software or empirical formula
4. **Small sample trial**: Weigh 50-100g for mixing
5. **Drawdown comparison**: Compare with target under standard light source
6. **Formula correction**: Record deviation, adjust ratio and retry
7. **Batch mixing**: Scale up proportionally after confirmation
**Important notes**:
- Record detailed formula for each mixing (precise to 0.1g)
- Consider color shift after drying (usually 5-10% darker)
- Different batches of base ink may vary, recalibrate accordingly
---
## Part 3: Maintenance (Q13-Q17)
### Q13: What are the daily maintenance tasks for screen printing machines?
**Answer**: Tiered maintenance plan:
**Daily maintenance **(10 minutes before and after shift)
- [ ] Clean screen and squeegee, remove residual ink
- [ ] Check air pressure and lubricant level
- [ ] Clean waste container and wiping cloths
- [ ] Turn off power and air supply
**Weekly maintenance **(1 hour)
- [ ] Lubricate transmission chains and bearings
- [ ] Check and adjust belt tension
- [ ] Clean ink pump and pipelines
- [ ] Check electrical connections for looseness
**Monthly maintenance **(4 hours)
- [ ] Replace air filters
- [ ] Check squeegee blade wear
- [ ] Calibrate registration system and EPC
- [ ] Clean electrical cabinet and control panel
**Annual maintenance **(1-2 days)
- [ ] Replace all lubricating oil and filters
- [ ] Comprehensive transmission system clearance check
- [ ] Update electrical components (relays, sensors)
- [ ] Overall equipment accuracy inspection and calibration
### Q14: What is screen lifespan? How to extend it?
**Answer**: Factors affecting screen life:
**Typical lifespan**:
- Nylon screen: 5,000-10,000 impressions
- Polyester screen: 10,000-20,000 impressions
- Stainless steel screen: 50,000-100,000 impressions
**Behaviors that shorten life**:
- Using overly hard squeegee (>95 Shore A)
- Excessive squeegee pressure (>0.8MPa)
- Using strong solvents for cleaning (corrodes emulsion)
- Storing under pressure or folded
**Methods to extend life**:
- Select appropriate mesh count and thread diameter
- Use recommended squeegee pressure range
- Use mild cleaners (neutral or weak alkaline)
- Store vertically, avoid heavy pressure
- Regularly test tension, replace loose screens promptly
### Q15: How often should squeegees be replaced? How to judge?
**Answer**: Squeegee replacement criteria:
**Visual inspection**:
- Obvious nicks or wavy edge
- Edge radius >0.2mm (new is ~0.05mm)
- Visible scratches or deformation on surface
**Print quality signals**:
- Streaks or unevenness in ink layer
- Fine text and lines not printing clearly
- Need to continuously increase pressure for normal ink transfer
**Service life reference**:
- Polyurethane squeegee: 500-1000 operating hours
- Rubber squeegee: 300-500 operating hours
- Metal squeegee: 2000-5000 operating hours
**Replacement recommendations**:
- Maintain squeegee usage log with installation date and impressions
- Keep 2-3 spare squeegees for timely replacement
- Clean squeegee holder when replacing to ensure installation accuracy
### Q16: How to maintain equipment during long-term shutdown?
**Answer**: Shutdown maintenance by duration:
**Short-term **(1-7 days)
- Clean screen and squeegee to prevent ink drying
- Drain remaining ink from bucket or seal for storage
- Turn off power, cover with dust cover
**Medium-term **(1-4 weeks)
- Complete all short-term steps
- Lubricate all moving parts
- Relax belt and chain tension
- Run empty 5-10 minutes weekly to maintain flexibility
**Long-term **(>1 month)
- Complete all medium-term steps
- Remove screen and squeegee, store separately
- Drain all ink and solvent from pipelines
- Place desiccant in electrical cabinet
- Monthly inspection, run powered for 15 minutes
**Before restarting**:
- Comprehensive cleaning and lubrication
- Check electrical safety
- No-load test run for 30 minutes
- Test print to confirm all functions normal
### Q17: What are common wearing parts? Spare parts inventory suggestions?
**Answer**: Wearing parts list and inventory strategy:
**High-consumption items **(keep 2-3 sets)
- Squeegees (various hardness and sizes)
- Screens (common mesh counts)
- Air filters
- Seals and O-rings
**Medium-consumption items **(keep 1-2 sets)
- Transmission belts
- Bearings (critical positions)
- Solenoid valves
- Sensors (photoelectric, proximity switches)
**Low-consumption items **(purchase as needed)
- Servo motors
- PLC modules
- Touchscreens
- UV lamps
**CAPAMA service**:
- Free wearing parts package worth 5,000 RMB at purchase
- Provide spare parts list and ordering channels
- Emergency parts shipped within 24 hours
---
## Part 4: Cost & Upgrades (Q18-Q20)
### Q18: How to calculate per-meter cost for screen printing?
**Answer**: Cost breakdown analysis (using RR-320S as example):
**Fixed costs**:
- Equipment depreciation: Assuming 300,000 RMB equipment, 5-year depreciation = 500 RMB/day
- Factory rent: 200 RMB/day
- Labor cost: 2 persons × 300 RMB/day = 600 RMB/day
- **Total**: 1,300 RMB/day
**Variable costs**:
- Material cost: Depending on product type, approximately 0.5-2 RMB/meter
- Ink cost: Approximately 0.05-0.2 RMB/meter
- Energy consumption: Approximately 0.03 RMB/meter
- Screen consumption: Approximately 0.02 RMB/meter
**Per-meter cost calculation**:
Assuming daily output 2,000 meters:
- Fixed cost allocation: 1,300 ÷ 2,000 = 0.65 RMB/meter
- Variable costs: 0.5 + 0.1 + 0.03 + 0.02 = 0.65 RMB/meter
- **Total cost**: Approximately 1.3 RMB/meter
**Cost reduction methods**:
- Increase equipment utilization (add shifts or orders)
- Optimize process to reduce defect rate
- Bulk purchasing to lower material costs
- Preventive maintenance to reduce downtime losses
### Q19: Can old equipment be upgraded? What options are available?
**Answer**: CAPAMA offers various upgrade solutions:
**Automation upgrades**:
- Install servo drive system (replace mechanical transmission)
- Upgrade to touchscreen control system
- Add automatic splicing and EPC correction
- **Investment**: 80,000-150,000 RMB
- **Effect**: 30-50% efficiency improvement, reduce 1 operator
**Function expansion**:
- Add printing color stations (e.g., upgrade from 2 to 4 colors)
- Install UV drying or infrared heating
- Inline die-cutting, inspection, slitting units
- **Investment**: 100,000-300,000 RMB
- **Effect**: Expand product line, increase added value
**Smart upgrades**:
- Install CCD online quality inspection
- Connect to MES production management system
- Enable remote monitoring and fault diagnosis
- **Investment**: 50,000-100,000 RMB
- **Effect**: Controllable quality, traceable data
**Evaluation process**:
1. Provide existing equipment model and age
2. CAPAMA engineer on-site survey
3. Issue upgrade proposal and quotation
4. Shutdown改造 (typically 3-5 days)
5. Commissioning, acceptance, and training
**Note**: Equipment over 10 years old or with severely worn core components, consider buying new.
### Q20: What negotiation tips when purchasing new equipment?
**Answer**: Rational procurement suggestions:
**Preparation**:
- Define your needs (product type, output, budget)
- Research 3-5 suppliers' products and prices
- Visit existing customers to see actual usage
- Understand industry average pricing and payment terms
**Negotiation points**:
- **Price**: Aim for 5-10% discount or free accessories
- **Payment terms**: Negotiate favorable installments (e.g., 3-3-3-1)
- **Delivery time**: Clarify breach of contract compensation
- **Warranty period**:争取 extend to 2 years or more
- **Training content**: Request advanced training and refresher courses
- **Spare parts pricing**: Lock in common parts prices for 3 years
**Pitfall avoidance**:
- Beware of prices far below market (may be refurbished or downgraded)
- Don't ignore after-sales service quality and response speed
- Contract must specify technical parameters and acceptance criteria
- Retain final payment (10-20%) until stable operation for 3 months
**CAPAMA commitment**:
- Transparent pricing, no hidden fees
- Standard 1-year warranty, extendable to 3 years
- 24-hour technical support response
- Lifetime spare parts and technical upgrades
---
## Conclusion
Screen printing is a craft combining technology and experience. Correct equipment selection, skilled process adjustment, and standardized maintenance are all essential. CAPAMA is willing to share 20 years of industry accumulation to help you stand out in the competitive market.
**Technical Support & Consultation**:
- Hotline: +86-13761062128
- Email: info@capama.com
**Next issue preview**: "Label Printing Machine Buying Guide: Comprehensive Planning from Budget to Capacity"
---
**About CAPAMA**
CAPAMA (Shanghai) Machinery Co., Ltd., specializing in label printing equipment R&D and manufacturing for 20 years. Main products include Rotary Letterpress (CPM270L), Roll-to-Roll Screen Printers (CPM 520SX/SXT, RR-320S/520S/320ST), Digital Printing & Die-Cutting Machine (ZH-CW65), Multi-Layer Label Laminating Machines (CPM-350ET/ETS/ETF). CE certified, trusted by 500+ customers worldwide.
*Content based on CAPAMA technical service cases, for reference only. Please refer to equipment manual and official training for specific operations.*